The Coinex Smart Chain blockchain was launched in 2021, this created a lot of buzz in the dapps developer community, as Coinex Smart Chain has many advantages & solutions that its predecessor i.e. ethereum did not have. Coinex Smart Chain hereinafter referred to as “CSC” makes it easy for blockchain dapps developers to daps or applications on the CSC blockchain, developers can easily move their dapps to CSC, because the CSC blockchain supports EVM. Dapps developers will also not bother thinking about high gas costs, because CSC has the advantage of “cheap gas costs”, when compared to ethereum then eth 2000:1 csc (gas cost comparison when this article was written)
CRC20 is a technical standard for writing smart contracts on the coinex smart chain blockchain network, it is used to implement tokens on CSC. CRC20 contains a set of rules that all tokens based on the coinex smart chain must follow.
CRC20 Token is defined as a blockchain-based asset that allows or can be sent or received and has value, actually CRC20 is similar to bitcoin, litecoin, monero in many aspects, but has a difference, namely CRC20 runs on the Coinex Smart Chain blockchain, and uses Gas Fee to pay network (gas cost using coin natic CET)
Create – Deploy Token CRC20 Coinex Smart Chain
Now that we know what CRC20 is and how it works, we can now create or deploy our own tokens on the CSC blockchain
1. Buy Coin Nativ CET *from the Coinex Smart Chain blockchain
You have to prepare CET coins, these coins are used to pay gas fees on the CSC network. To get CSC coins you can buy them on Coinex Exchange, and send CET coins to your Metamask Wallet, I recommend using Metamask PC
2. Prepare Solidity File
To create a CRC20 token we need a solidity file, if you are an EVM blockchain developer, then you are familiar with solidity programming. You can use Openzepplin to create solidity files. here is an example of a simple file that I created using openzepplin
// SPDX-License-Identifier: MIT
pragma solidity ^0.8.2;
import “@openzeppelin/contracts/token/ERC20/ERC20.sol”;
contract CSCTokenTest is ERC20 {
constructor() ERC20(“CSC Token Test”, “CTT”) {
_mint(msg.sender, 1000 * 10 ** decimals());
}
}
CSCTokenTest = Is the name of the contract
CSC Token Test = Is the name of the token that we will create
CTT = Is Symbol token
1000 = Is the number of tokens that we will deploy
*You can replace it according to your wishes
3. Deploy Token CRC20 Use Remix Ethereum
You can use remix.ethereum.org to deploy tokens on an EVM-enabled blockchain. CSC supports EVM so I use remix.ethereum.org to create smart contracts or deploy tokens
– Go to remix.ethereum.org and Create file = example myCTT.sol and paste the solidity smart contract above

– Select compiler 0.8.2 + Click auto compiler + Click Enable Optimization + Click Complie

– Click the Environment Menu = Select “Injected Web3” and Connect with Metamask
– Click the Contract Menu = Select your Contract, for example “CSCTokenTest”
– Click DEPLOY and confirm on your Metamask

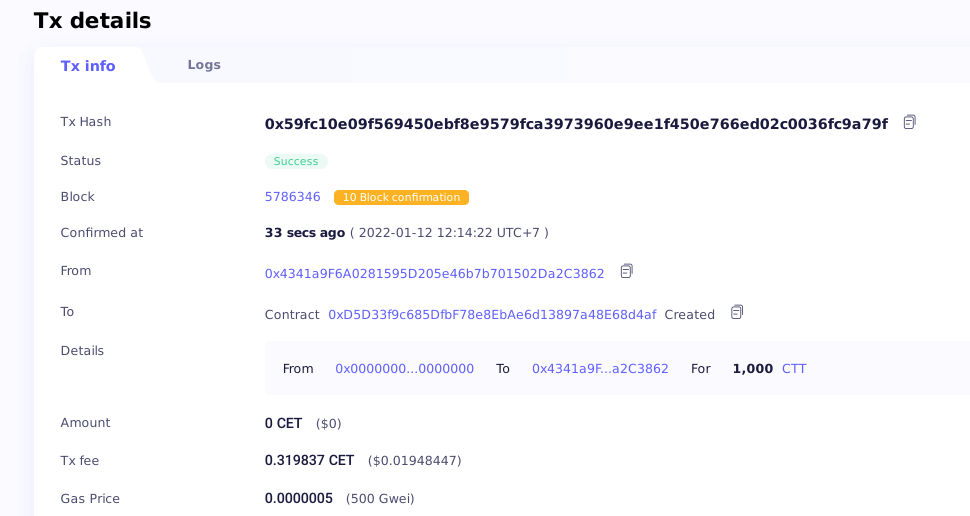
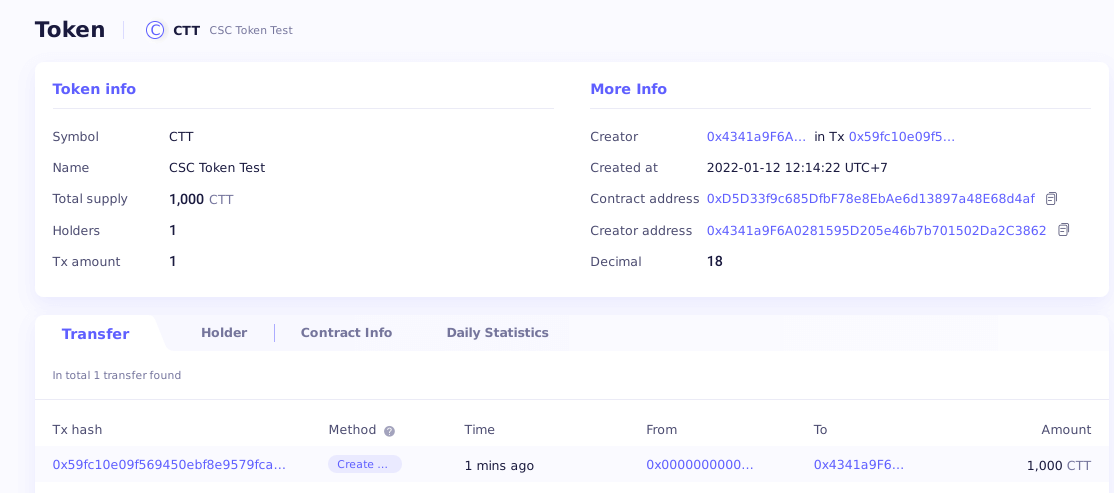
4. Check token in BlockExplorer & Add smart contract to metask
After confirming in metamask. The smart contract deployment process will be broadcast on the blockchain, just wait 5-10 seconds, the smart contract is successfully created and the CRC Token is also successfully created. In the process of making a smart contract or token on the coinex smart chain, only a gas fee of 0.32 CET or $0.0199 according to the current CET rate. Fees at CSC are very cheap, in contrast to ethereum which requires $145 to create a smart contract or token
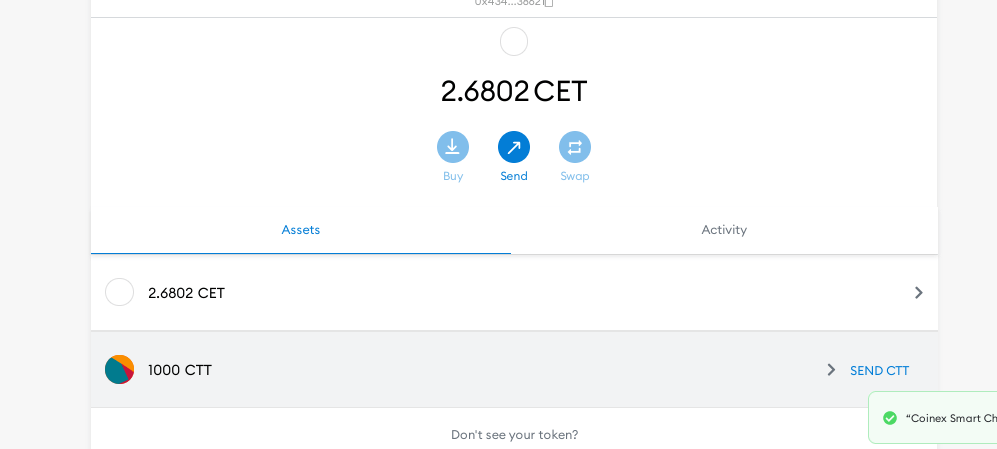
After the creation of the CSC token is complete, you can transfer it to another wallet or it can be listed on the DEX exchange. Token creation in CSC is very fast and very cheap, if you create a smart contract on ethereum, it will take you 20-50 minutes to confirm.