CRC stands for Coinex Request for Comment, and 721 is the identification number on the proposal. CRC is one of the application standards in the CSC blockchain ecosystem (coinex smart chain), the developers who built the CRC are responsible for establishing conventions on the coinex blockchain and after the proposal is reviewed, and approved by the community for a standard. CRC721 was created to propose functionality to transfer NFTs and track NFTs on smart contracts.
CRC721 has now become an open standart used to build Non-Fungiable tokens on the coinex smart chain blockchain, CRC721 has a standard interface and has a set of rules that can work with NFT.
NFT stands for Non-Fungiable Token, NFT is not only type CRC721, but there are other standards, namely CRC1155, for example opensea, they use the standard ERC1155 ethereum network and polygon matic. You can choose, which token standard you prefer to create NFT. in this article we will provide a tutorial How to create a CRC721 NFT token on the coinex smart chain blockchain
1. Prepare Coin Nativ from the Coinex Smart Chain (CET)
“CET” is the native coin of the coinex smart chain blockchain, which is used to pay gas fees or network transactions, just like ether and bnb. To get CET you can buy on the coinex exchange.
2. Wallet (Metamask)
I recommend you use a browser metamask, to make it easier. actually you can use another wallet, but for convenience, it’s better to use the chrome or firefox browser metamask. If you already have a metamask wallet, don’t forget to set the RPC network to the RPC network coinex smart chain, and fill your wallet with some CET coins
3. Deploy CRC721 on Remix Ethereum
go to remix.ethereum.org and connect with your metamask wallet. Create a new file *example CRC721_token.sol
– Insert the CRC721 smart contract (below) into the file,
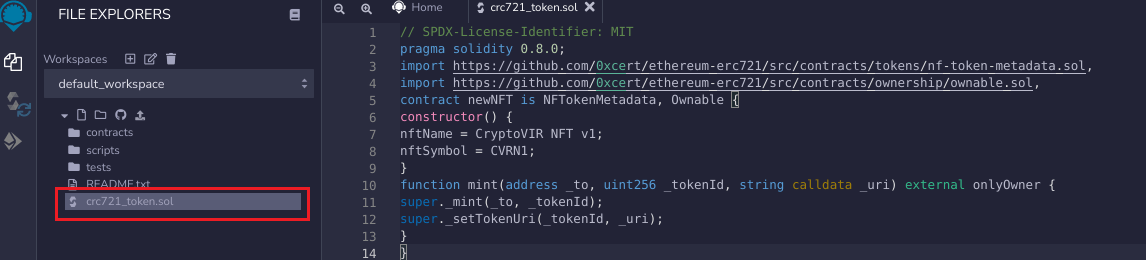
// SPDX-License-Identifier: MIT
pragma solidity 0.8.6;

import "https://github.com/0xcert/ethereum-erc721/blob/master/src/contracts/tokens/nf-token-metadata.sol";
import "https://github.com/0xcert/ethereum-erc721/blob/master/src/contracts/ownership/ownable.sol";

contract CRVN1 is NFTokenMetadata, Ownable {

constructor() {
nftName = "CryptoVIR NFT v1";
nftSymbol = "CVRN1";
}

function mint(address _to, uint256 _tokenId, string calldata _uri) external onlyOwner {
super._mint(_to, _tokenId);
super._setTokenUri(_tokenId, _uri);
}

}
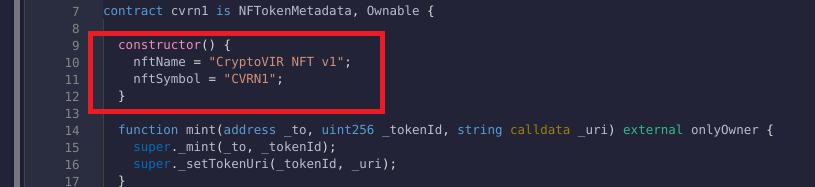
– Setting nftName and nftSymbol
Settings according to what you want, nftName for the name of the NFT, and nftSymbol for the symbol (abbreviation) of your nft.
– Compile Smart Contract
Compile your smart contract using the 0.8.0 compiler, and use the enable optimization “200“ . If a green check mark appears, it means that there is no writing error in the smart contract.

– Deploy Smart Contract
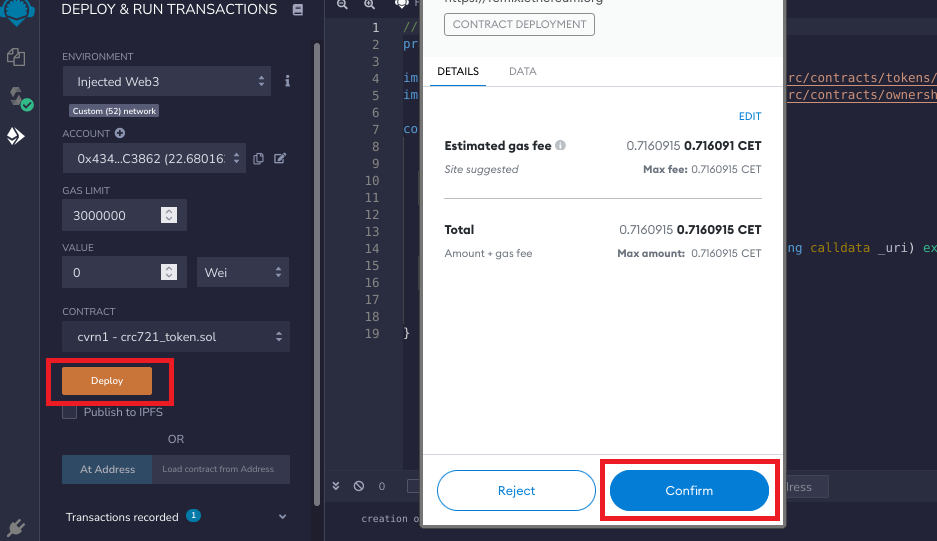
After compiling is complete and there are no errors in the code, then deploy crc721 to the coinx blockchain. Click environment and select “Injected Web3”. Select the contract *my example is CVRN1 , Click “Deploy” and Click Confirm” on the metamask
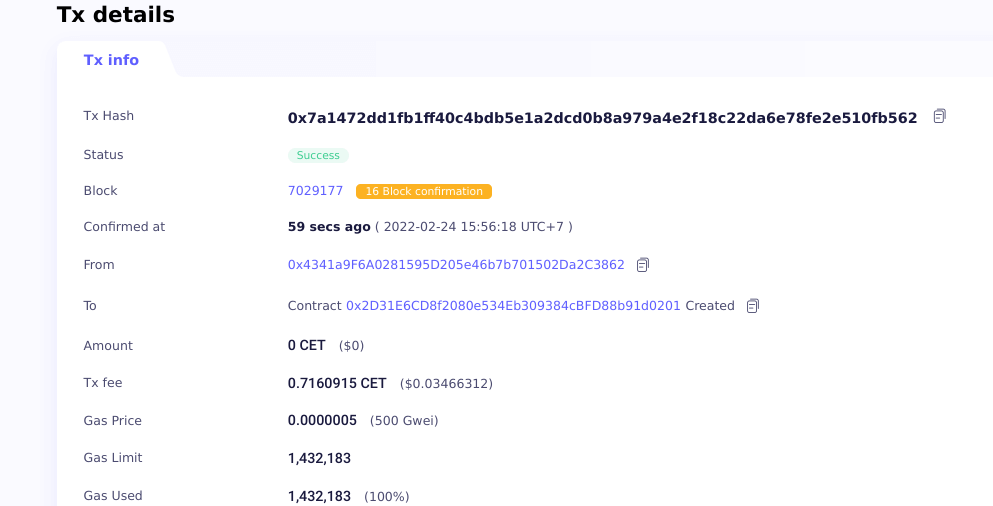
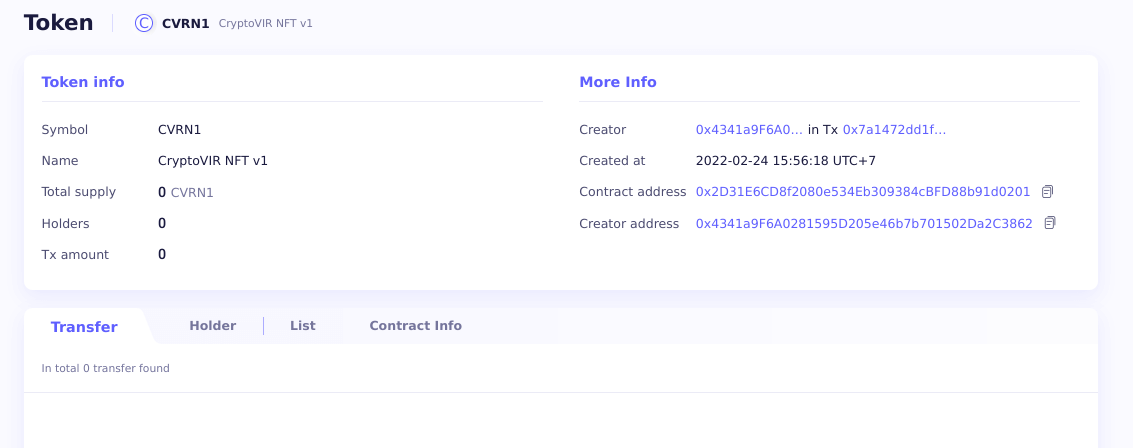
– CRC721 Token Creation Complete
After a few seconds the crc721 creation process will be completed, and crc721 has been fully deployed on the coinx smart chain blockchain. This process is very fast and only takes 3-5 seconds and the gas fee is very cheap (around 0.75 CET or equivalent to $ 0.045). It’s fantastic, fast and very cheap, in contrast to ethereum, which requires a gas fee of $100 more and takes 5-10 minutes to build erc721