Token Lock is a method for locking CRC20 tokens or Liquidity Tokens on DEX exchanges for a specific purpose, usually developers tokenlock to protect users, and to increase trust from the community. Locking tokens can aim to control the supply of tokens with a term locking system, for example, investors get an allocation of 1000 tokens, but the tokens are locked for a period of 1 year, the goal is that investors do not sell tokens before not even 1 year. After 1 year is over, investors can unlock or withdraw tokens from smart contracts or DApps.
In other cases, Token Lock is used to lock Liquidity Tokens, for example, project A is building a token, then the token is listed on the DEX exchange (by entering liquidity), so that the community trusts the project, the developer will lock the liquidity provider token with time. certain time (eg 2-5 years), the aim is nothing but to make the community believe that the developer will not revoke liquidity within a certain time.
Locking tokens can also be used in several other aspects, such as airdrop distribution, marketing allocation or team token allocation. The token lockup can be a smart contract only, or a smartcontract + front end application that uses cms or reactJS. In this article I will give a tutorial on how to create a time base crc20 coinex smart chain token lock. This step is simple, because I will explain on the side of the smart contract without explaining on the side of making the front end.
How to make a coinex smart chain crc20 token lock
The thing you need to prepare is to create a token lock crc20 coinex smart chain.
1. Wallet & RPC Coinex
You can use a chrome or firefox metamask wallet, don’t forget to set the rpc to rpc coinex smart chain. below is the detail of rpc coinx smart chain
2. Coin CET
CET is a native coin of the coinex smart chain blockchain, the cet coin is used to pay for the network or pay for contract interactions on the CSC blockchain. To get CET coins you can buy them on the coinex exchange. if you already have a coin cet, immediately transfer it to your wallet.
3. Token CRC20
Because this article is a tutorial on how to lock crc20 tokens, of course you must have a crc20 token with decimal 18 (recommended). If you don’t have it you can deploy it using the smart contract below.
// SPDX-License-Identifier: MIT
pragma solidity ^0.8.4;

import "@openzeppelin/contracts/token/ERC20/ERC20.sol";

contract CSCTokenTest1 is ERC20 {
constructor() ERC20("CSCTokenTest1", "CTT1") {
_mint(msg.sender, 100000 * 10 ** decimals());
}
}
4. Smart Contract Token Lock
This smart contract functions to lock crc20 tokens for a certain period of time, you can determine the locking time according to your wishes, you can also upload a list of token recipients and the number of tokens obtained at each address. Open remix.ethereum.org , create a .sol file (example tokenlock.sol) , paste the smart contract below
// SPDX-License-Identifier: MIT

pragma solidity 0.8.11;

import "@openzeppelin/contracts/token/ERC20/utils/SafeERC20.sol";
import "openzeppelin-solidity/contracts/utils/math/SafeMath.sol";

contract TokenLOCK {
bool internal locked;
using SafeERC20 for IERC20;
using SafeMath for uint256;
address payable public owner;
bool public allIncomingDepositsFinalised;
uint256 public initialTimestamp;
bool public timestampSet;
uint256 public timePeriod;
mapping(address => uint256) public alreadyWithdrawn;
mapping(address => uint256) public balances;
uint256 public contractBalance;
IERC20 public erc20Contract;
event TokensDeposited(address from, uint256 amount);
event AllocationPerformed(address recipient, uint256 amount);
event TokensUnlocked(address recipient, uint256 amount);

constructor(IERC20 _erc20_contract_address) {
allIncomingDepositsFinalised = false;
owner = payable(msg.sender);
timestampSet = false;
require(address(_erc20_contract_address) != address(0), "_erc20_contract_address address can not be zero");
erc20Contract = _erc20_contract_address;
locked = false;
}

modifier noReentrant() {
require(!locked, "No re-entrancy");
locked = true;
_;
locked = false;
}

modifier incomingDepositsStillAllowed() {
require(allIncomingDepositsFinalised == false, "Incoming deposits have been finalised.");
_;
}

modifier onlyOwner() {
require(msg.sender == owner, "Message sender must be the contract's owner.");
_;
}

modifier timestampNotSet() {
require(timestampSet == false, "The time stamp has already been set.");
_;
}

modifier timestampIsSet() {
require(timestampSet == true, "Please set the time stamp first, then try again.");
_;
}

receive() payable external incomingDepositsStillAllowed {
contractBalance = contractBalance.add(msg.value);
emit TokensDeposited(msg.sender, msg.value);
}

function finalizeAllIncomingDeposits() public onlyOwner timestampIsSet incomingDepositsStillAllowed {
allIncomingDepositsFinalised = true;
}

function setTimestamp(uint256 _timePeriodInSeconds) public onlyOwner timestampNotSet {
timestampSet = true;
initialTimestamp = block.timestamp;
timePeriod = initialTimestamp.add(_timePeriodInSeconds);
}

function withdrawEth(uint256 amount) public onlyOwner noReentrant{
require(amount <= contractBalance, "Insufficient funds");
contractBalance = contractBalance.sub(amount);
owner.transfer(amount);
}

function depositTokens(address recipient, uint256 amount) public onlyOwner timestampIsSet incomingDepositsStillAllowed {
require(recipient != address(0), "ERC20: transfer to the zero address");
balances[recipient] = balances[recipient].add(amount);
emit AllocationPerformed(recipient, amount);
}

function bulkDepositTokens(address[] calldata recipients, uint256[] calldata amounts) external onlyOwner timestampIsSet incomingDepositsStillAllowed {
require(recipients.length == amounts.length, "The recipients and amounts arrays must be the same size in length");
for(uint256 i = 0; i < recipients.length; i++) {
require(recipients[i] != address(0), "ERC20: transfer to the zero address");
balances[recipients[i]] = balances[recipients[i]].add(amounts[i]);
emit AllocationPerformed(recipients[i], amounts[i]);
}
}

function transferTimeLockedTokensAfterTimePeriod(IERC20 token, address to, uint256 amount) public timestampIsSet noReentrant {
require(to != address(0), "ERC20: transfer to the zero address");
require(balances[to] >= amount, "Insufficient token balance, try lesser amount");
require(msg.sender == to, "Only the token recipient can perform the unlock");
require(token == erc20Contract, "Token parameter must be the same as the erc20 contract address which was passed into the constructor");
if (block.timestamp >= timePeriod) {
alreadyWithdrawn[to] = alreadyWithdrawn[to].add(amount);
balances[to] = balances[to].sub(amount);
token.safeTransfer(to, amount);
emit TokensUnlocked(to, amount);
} else {
revert("Tokens are only available after correct time period has elapsed");
}
}

function transferAccidentallyLockedTokens(IERC20 token, uint256 amount) public onlyOwner noReentrant {
require(address(token) != address(0), "Token address can not be zero");
require(token != erc20Contract, "Token address can not be ERC20 address which was passed into the constructor");
token.safeTransfer(owner, amount);
}
}
# Compile with Compiler 0.8.11
# Enable Optimization 200
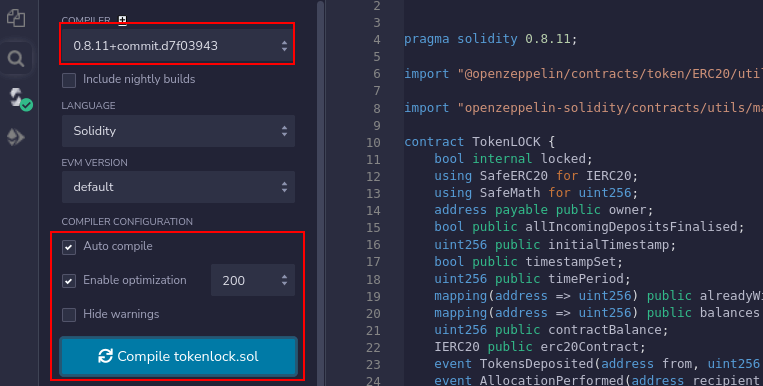
# contract TokenLOCK = is the name of the contract, you can change it as you wish, this name will appear in the coinex smart chain explorer.
# Deploy, before deploying the Token Lock smart contract, you must enter the CRC20 Smart Contract token that you previously created.
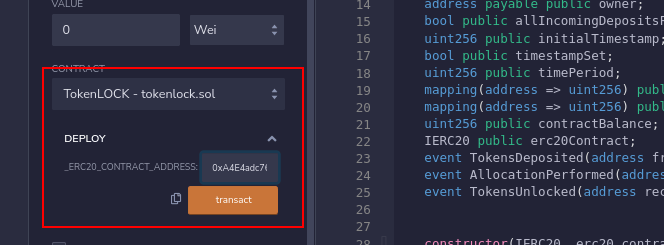
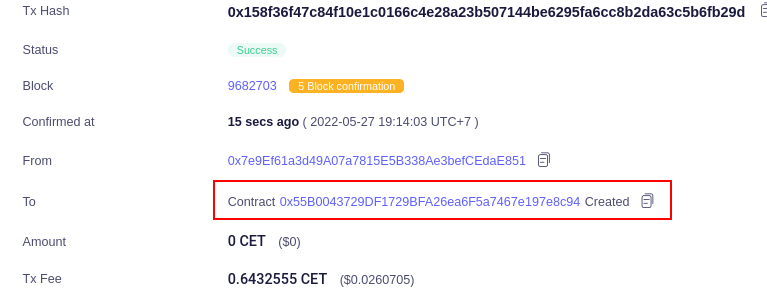
# Deploy Done, the tokenlock smart contract is ready
5. Smart contract verification
Verification of smart contracts in the explorer coinex smart chain is quite easy, the trick is to enter the smart contract TokenLock (which has been merged using the flattener plugin) into the explorer coinex smart chain, use the steps below.
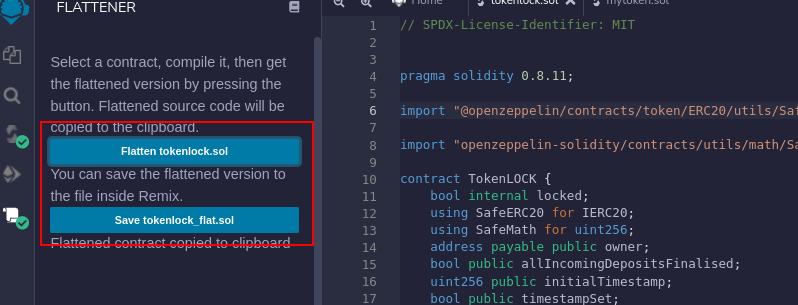
# Activate the FLATTENER plugin in remix-ethereum
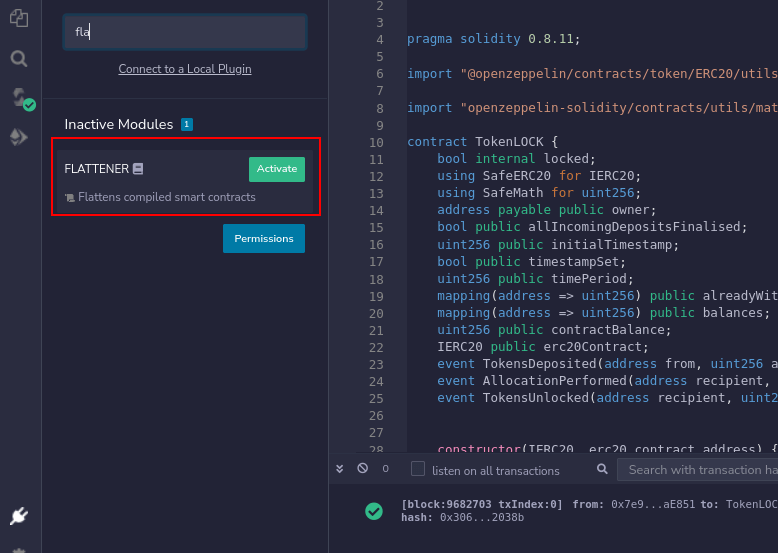
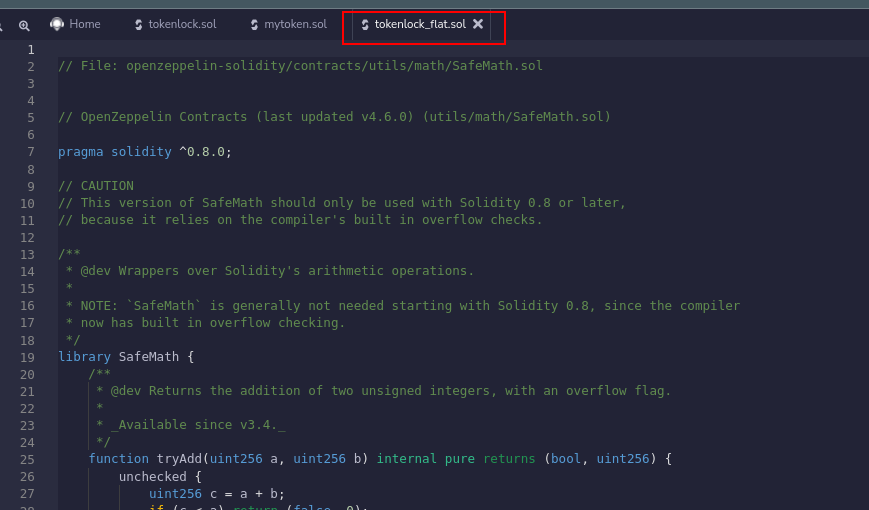
# Merge smart contract TokenLock using flattener & save smart contract , after that a new file with a different name will appear, for example TokenLock_flat.sol . We use the file for verification or upload it to explorer
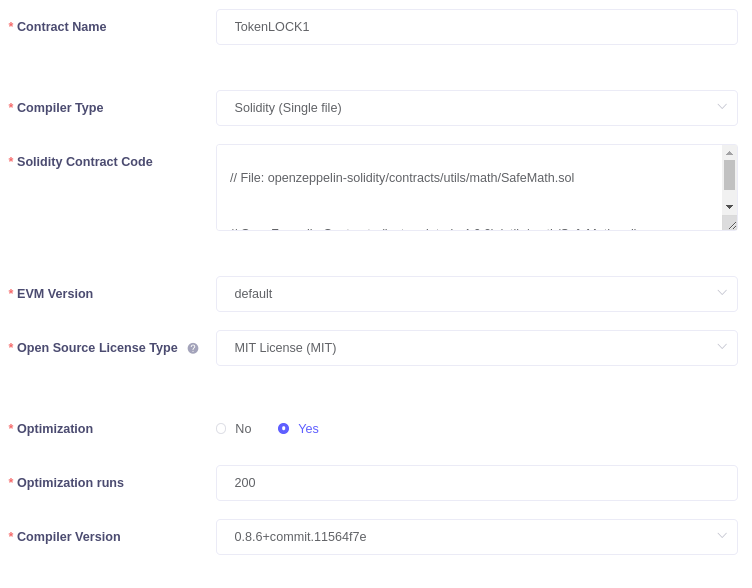
# Upload to Coinex Smart Chain Explorer by Login to “Contract Info” click “Verify & Publish”

# Enter “Contract Name” according to your smart contract,
# “Compiler Type” select Solidity Single File
# Enter flat smart contract
# “EVM Version” select Default
# “License Type” MIT License
# “Optimization” Yes, 200
# “Compiler Version” select according to the compiler you use in remix-ethereum
# Click Submit or Verify
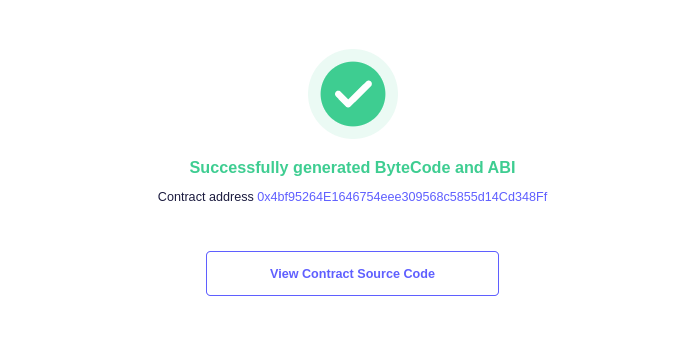
Smart Contract TokenLock is fully ready to use to lock crc20 coinex smart chain tokens. In the next article I will discuss how to lock tokens, lock time settings, token allocation settings for certain addresses and how to withdraw tokens from smart contracts.
If you experience problems when verifying smart contracts in the Coinex Smart Chain explorer, please double-check, compiler version, contract name and enable optimization. Sometimes the smart contract can’t be verified because there is a difference in the compiler version between the (example) compiler in remix-ethereum and explorer, so make sure carefully, so that there are no errors