Playing crypto faucet is very fun, you will get tokens or coins with a certain amount (usually a small amount) just by doing tasks or just claiming. Simply by using a smartphone or PC you can complete some of the simple tasks listed in the faucet application and get prizes that are sent directly to the wallet. If you consistently use the faucet for a long time, you will get quite a large profit
Crypto faucets are usually web applications, android-ios applications or smart contracts, each faucet has different conditions, depending on the developer who manages the faucet. Faucets can also be used for project promotion, when many users are more familiar with the project, it is likely that the project will go viral faster or be successful.
In this article we will provide a tutorial on how to make a faucet on the coinex smart chain. This faucet will provide a small number of native coinex smart chain (CET) coins to anyone who requests the smart contract faucet.
What is Needed to Make a CET Faucet?
1# Wallet
To interact with the coinex smart chain blockchain, you can use the wallet metamask browser (chrome/firefox), you can download the wallet extension on the official metamask website. Once installed in the browser, you have to set the RPC wallet to RPC coinex smart chain.
RPC URL : https://rpc.coinex.net
Network Name : Coinex Smart Chain
ChainID : 52
Symbol : CET
Block Explorer : https://www.coinex.net
2# Coin CET
Just like eth on the ethereum blockchain, cet is used to pay for all types of transactions on the coinex smart chain blockchain, such as swaps, send cets, send crc20 tokens, trading, minting, deploying smart contracts, and others. You can get CET coins on the coinex exchange, for now the cet coins are priced at $0.037. After you have CET coin, immediately send it to your hosting wallet,

3# Smart Contract CET Faucet
// SPDX-License-Identifier: MIT
pragma solidity >= 0.7.0 <= 0.7.4;
contract Faucet{ address owner;
mapping (address => uint) timeouts;

    event Withdrawal(address indexed to);
    event Deposit(address indexed from, uint amount);

    constructor() {
        //Will be called on creation of the smart contract.
        owner = msg.sender;
    }

    //  Sends 0.1 ETH to the sender when the faucet has enough funds
    //  Only allows one withdrawal every 60 mintues
    function withdraw() external{

        require(address(this).balance >= 0.1 ether, "This faucet is empty. Please check back later.");
        require(timeouts[msg.sender] <= block.timestamp - 60 minutes, "You can only withdraw once every 60 minutes. Please check back later.");

        msg.sender.transfer(0.1 ether);
        timeouts[msg.sender] = block.timestamp;

        emit Withdrawal(msg.sender);
    }

    //  Sending Tokens to this faucet fills it up
    receive() external payable {
        emit Deposit(msg.sender, msg.value);
    }


    //  Destroys this smart contract and sends all remaining funds to the owner
    function destroy() public{
        require(msg.sender == owner, "Only the owner of this faucet can destroy it.");
        selfdestruct(msg.sender);
    }
}
How to Make a CET Faucet – Coinex Smart Chain ?
1# Deploy Smart Contract Faucet
To deploy a smart contract faucet is very easy, there are only 3 steps, the smart contract will soon be live on the coinex smart chain blockchain
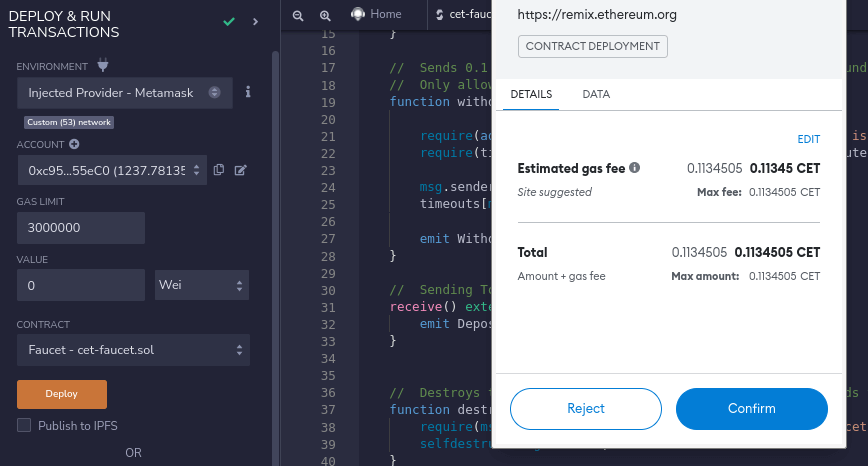
- Go to RemixIDE coinex, Create a new file there
- Paste the faucet smart contract above, and compile it to completion
- Click deploy smart contract, and confirm in your wallet
There are several things you need to set
- require(address(this).balance >= 0.1 ether : this is the number of CET coins that the user will get when requesting a smart contract
- require(timeouts[msg.sender] <= block.timestamp – 60 minutes : this is the waiting time, to re-request in the smart contract
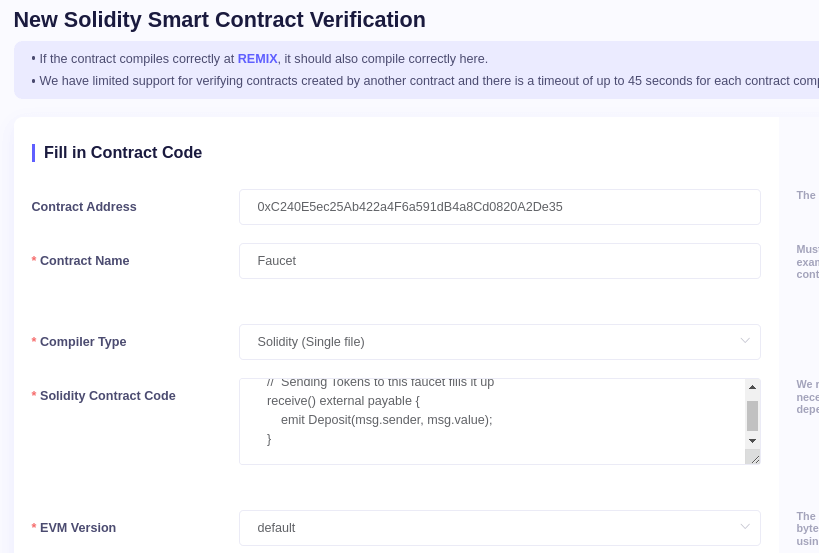
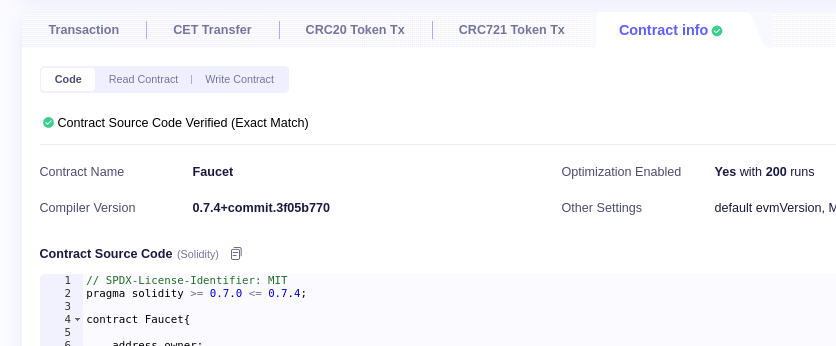
2# Smart Contract Verification
After the faucet smart contract creation is complete, you have to verify in the coinex smart chain explorer, so that the smart contract is truly transparent, anyone can see the code and can interact with the smart contract
- Enter the faucet smart contract (address) in the coinex explorer
- Click “Contract Info”
- Click “Verify & Publish”
- Fill in all the required data
- Verification
3# Send Coin CET to Smart Contract Address
Send some CET coins to the smart contract faucet, If you target 10,000 CET requests, then you have to send 1000 CET coins to the smart contract, because each smart contract request will send 0.1 CET coins to the user
4# Smart Contract Information
- Destroy = Is a function to take all CET coins in the smart contract (only for the owner)
- Widrawal = Is a function to request coin cet, user will get 0.1 cet for 1 time request
5# Test Faucet
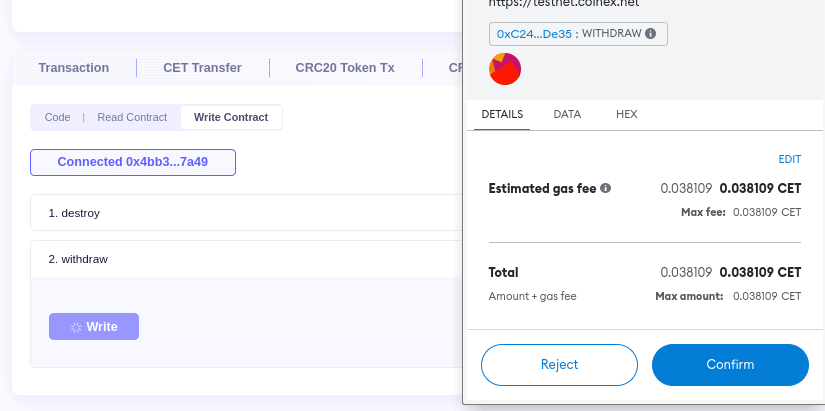
- Enter the faucet smart contract in explorer, click “Contract Info”
- Click “Write Contract”
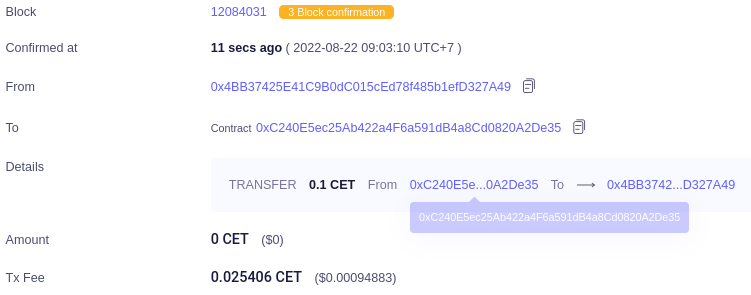
- In the Widrawal section, click “Write”, Confirm in your wallet, and wait 3-5 seconds
- You will receive 0.1 CET
- To re-request, please wait 60 minutes