A validator on a blockchain is a server that participates as a participant in a PoS (Proof-of-Stake) based blockchain network, the validator has the duty or responsibility to verify new blocks and add these blocks to the blockchain network.
Validators have a very important role in PoS-based blockchains, they (validators) confirm the authenticity and accuracy of transactions. If the information they analyze is correct, then the transaction will be fully confirmed and the transaction data will be added to the blockchain permanently, and then the user can view the transaction record in the blockchain explorer.
Benefits of Being a Coinex Smart Chain Validator ?
Maybe you will ask, what are the benefits of being a blockchain validator? and maybe other people will also ask like that. Becoming a validator means you will get passive income, the concept is almost the same as staking, coin cet in the validator’s wallet will generate more coin cet, the amount of APR or the percentage of profit depends on the consensus of the blockchain.
An example of a validator (ifpool) on the coinex smart chain blockchain gets a profit of 1 CET for every confirmed block, if you look at the graph, the ifpool validator gets 83 cets every 200 blocks or around 3900 cets per day. It’s quite profitable, considering that this is passive income, you don’t have to work hard every time to get this passive income
What Is Required To Become A Validator?
1# Server
There are two options for building a coinex smart chain validator, you can use a local server or rent a server at a hosting & server provider.
Local Server : You have to make sure your validator server is on continuously 24 hours and has a stable connection, if the power goes out within a few hours, your validator server will stop producing blocks/staking.
Server Rental: This option is the easiest, because you don’t need server hardware maintenance, you don’t have to pay for electricity and internet fees, you just have to pay for server rental fees. There are several server providers that I recommend, apart from being cheap, the servers at these providers are also good and have high specifications.
nocix.net : you can use AMD server with 8core or 16core, server price starts from $35 per month
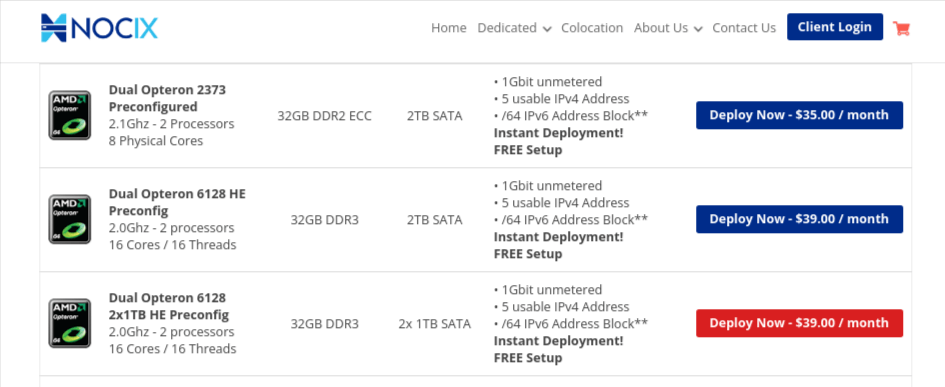
kimsufi.com : This provider is still under one roof with OVH Server, server rental prices are quite cheap, specifications are also good. server rental prices at kimsufi (promo) start from $ 25 per month.

2# Coin CET
To become a validator, you need coin CET, coin cet is a native coin of the coinex smart chain blockchain. Coin cet needed is (minimum) 10,000 Coins, the coin cet will be locked in the vaidator’s wallet, I suggest saving more cash coins in the validator’s wallet, the more coins cash you stake, the more passive income we get. To get coin cet, you can buy it coinex exchange, currently the price of one coin cet is (about) $0.042.
Will the CET coin disappear ?
Of course not, you can unlock it at any time, and the coins that are in the validator will return and you can use/transfer or sell.
Setup Validator Coinex Smart Chain
1# Install server : after you buy / rent a server, immediately install the server, I suggest you use ubuntu version 18 or version 20
2# Update ubuntu
sudo apt update -y
3# Clone Coinex Smart Chain Repository
mkdir coinex
cd coinex
git clone https://github.com/coinex-smart-chain/csc.git
4# Install Golang
Golang stands for Go language (Go language), Golang was created by Google, it is a very popular programming language and is generally used on server networks and large-scale distributed systems.
curl -OL https://golang.org/dl/go1.18.8.linux-amd64.tar.gz
Extract file golang in folder /usr/local/
sudo tar -C /usr/local -xvf go1.18.8.linux-amd64.tar.gz
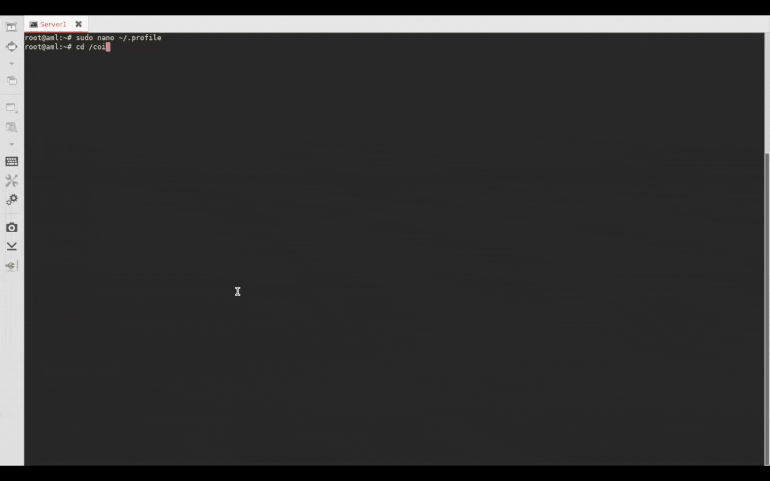
5# Setting Go Paths
sudo nano ~/.profile
Add this line, and save
export PATH=$PATH:/usr/local/go/bin
6# Compile
This is the process of compiling CSC, enter your CSC folder (which you previously created), you have to wait because this process takes a long time. After the compilation process is complete, the binaries generated by csc are located in the =build/bin directory
cd /coinex/csc
make cetd

7# Initialize
This command will create a data directory and a keystore directory in /path/your-data-localion-fold, and the process will create a Genesis Block. If default –datadir is not specified, it will create .cetd as the data directory and the ‘keystore’ directory in the current user’s home directory. As follows:
/root/.cetd
├── cetd
│ ├── chaindata
│ │ ├── 000001.log
│ │ ├── CURRENT
│ │ ├── LOCK
│ │ ├── LOG
│ │ └── MANIFEST-000000
│ ├── lightchaindata
│ │ ├── 000001.log
│ │ ├── CURRENT
│ │ ├── LOCK
│ │ ├── LOG
│ │ └── MANIFEST-000000
│ ├── LOCK
│ └── nodekey
└── keystore
8# Configuration
This configuration is used to make it easier for users to deploy CSC nodes.
cetd --config ./<your config file>
[Eth]
NetworkId = 52
SyncMode = "fast"
NoPruning = false
NoPrefetch = false
LightPeers = 100
UltraLightFraction = 75
DatabaseCache = 512
DatabaseFreezer = ""
TrieCleanCache = 256
TrieDirtyCache = 256
TrieTimeout = 100000000000
EnablePreimageRecording = false
EWASMInterpreter = ""
EVMInterpreter = ""

[Eth.Miner]
GasFloor = 30000000
GasCeil = 42000000
GasPrice = 500000000000
Recommit = 10000000000
Noverify = false

[Eth.TxPool]
Locals = []
NoLocals = true
Journal = "transactions.rlp"
Rejournal = 3600000000000
PriceLimit = 500000000000
PriceBump = 10
AccountSlots = 16
GlobalSlots = 4096
AccountQueue = 64
GlobalQueue = 1024
Lifetime = 10800000000000
[Eth.GPO]
Blocks = 20
Percentile = 60
[Node]
IPCPath = "cetd.ipc"
HTTPHost = "0.0.0.0"
NoUSB = true
InsecureUnlockAllowed = false
HTTPPort = 8545
HTTPVirtualHosts = ["localhost"]
HTTPModules = ["eth", "net", "web3", "txpool", "senatus"]
WSPort = 8546
WSModules = ["net", "web3", "eth"]

[Node.P2P]
MaxPeers = 200
NoDiscovery = false
StaticNodes = ["enode://6d97c62365495e706739822bf231bc4b13ad66ca0a5664965d437e40087c6c76f2cedf1286fffbcec2fc1500aa2634c70a26b2c7408c85081578ab85069b919f@3.134.208.169:26656", "enode://b858216d3c626dcc83ce6c9169d243cd8ebadd0dcdb67cdba5d63c4b6d6989c0a8fdf2278d5b68e20cc8eeefa8eb58cf4d5bb0c3dda3cbfae3e42586eb6897bb@47.52.163.174:26656"]
TrustedNodes = []
ListenAddr = ":26656"
EnableMsgEvents = false
[Node.HTTPTimeouts]
ReadTimeout = 30000000000
WriteTimeout = 30000000000
IdleTimeout = 120000000000
echo "your password" > password.txt
9# Start Mining
cetd --datadir /path/your-data-localtion-folder -unlock "your validator address" --password /path/your-keyfile-folder/password.txt --mine --allow-insecure-unlock
9# Create Validator Node
cetd validator.create --from 0xf2B4C0B0CCEDB64c58ab9961CAD94C1FaC6Ff1c7 --validator.rewardaddr 0x5b73262ad0463e3352a11e8213d69c8962209515 --validator.moniker '<your node moniker>' --validator.website '<your home site>' --validator.email '<your contract email>' --validator.detail '<your node description>' --keystore ./data/keystore/ --node http://127.0.0.1:8545
9# Stake Validator Node
cetd staking --from 0xf2B4C0B0CCEDB64c58ab9961CAD94C1FaC6Ff1c7 --validator.address 0x5b73262ad0463e3352a11e8213d69c8962209515 --validator.staking 10000000000000000000000 --keystore ./data/keystore/ --nodehttp://127.0.0.1:8545
9# Unstake Validator Node
cetd unstaking --from 0xf2B4C0B0CCEDB64c58ab9961CAD94C1FaC6Ff1c7 --validator.address 0x5b73262ad0463e3352a11e8213d69c8962209515 --keystore ./data/keystore/ --node http://127.0.0.1:8545